Harnessing AWS Public IP Range for Efficient Pentesting
Introduction
Picture this - you’ve got your coffee ready, and you’re kicking off a brand new (authorized) pentesting assignment on a public web application. On the login page as a teaser, you unleash a single SQLi payload - only to be slapped with a merciless 24 hour IP ban.
This was me recently.
Frustration simmered - but the next 24 hours got me thinking - why not use the vast expanse of the AWS Public IP range? I could navigate around this overzealous WAF with little interruption. I figured the simplest way to do this would be through the magic of AWS ECS, conjured up through a CloudFormation (CFN) template.
The Theory
- Tinyproxy is a light-weight HTTP/S proxy daemon
- Running a containerized version of it allows us to instantly spin up containers that proxy our HTTP/S traffic
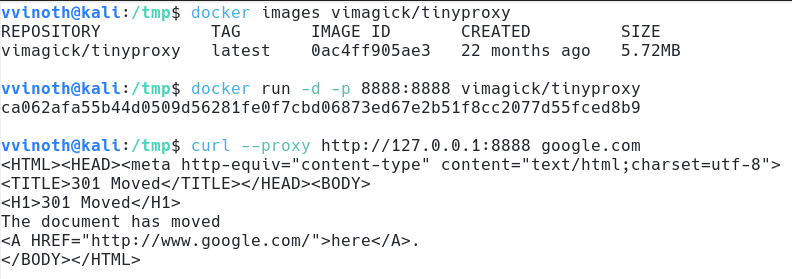
Using AWS Public IP Range
- In order to use the AWS Public IP Range we need resources within AWS
- We need a resource that can be spun up quickly, is scalable, and also cost effective
- ECS ticks all of these boxes - Once the infrastructure is setup and a container is successfully started, a public IP from this range is assigned:

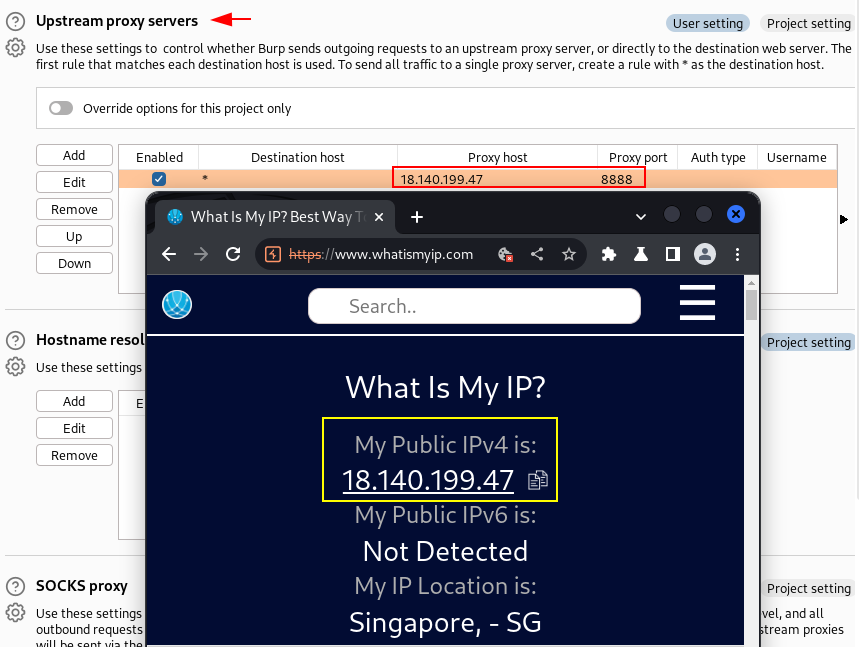
- we can use this proxy to access the internet - to illustrate this we are using a simple API from ipify.org that returns your public IP

- success ! we are using an AWS public IP
- we can also configure upstream proxy on burp to use this IP:
- if you need a new IP, simply stop and start the container
Taking it further - Proxies on Shuffle
- Thanks to the scalability of ECS you could spin up any amount of containers (if you’re willing to pay)
- Each container gives you a unique AWS Public IP - and you could use this in something like proxychains
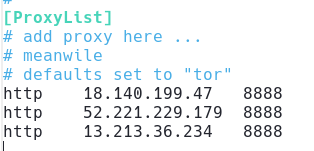
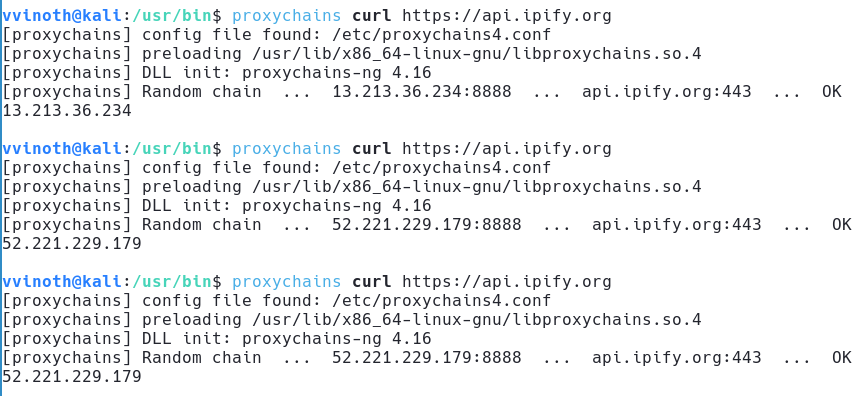
- for example proxychains in random mode - each request is proxied through a random selection from the list
Automating through CFN
-
CFN allows you to create templates that automate the deployment of AWS resources
-
To automate this entire setup/teardown i’ve created a CFN template which creates the necessary resources:
- ECS Cluster: unit for running containerized applications
- Service : manages 1 or more instances of a task definition in a cluster
- Task Definition: blueprint that defines the containerized application
- container image (vimagick/tinyproxy), port-mapping (8888:8888), and allocated resources(0.5 vCPU, 1GB Memory) are defined
AWSTemplateFormatVersion: '2010-09-09'
Description: deploy tinyproxy containers into ECS and proxy your traffic through the AWS Public IP Range (https://vvinoth.com/post/tinyproxy)

Parameters:
ECSClusterName:
    Type: String
    Description: A name for your ECS Cluster - where your resources will be associated
    Default: tinyproxy-cluster

VpcId:
    Type: 'AWS::EC2::VPC::Id'
    Description: Select VPC to use

SubnetIds:
    Type: 'List<AWS::EC2::Subnet::Id>'
    Description: Select subnets to use

ECSServiceName:
    Type: String
    Description: A name for your ECS Service
    Default: tinyproxy-service

SecurityGroupIds:
    Type: 'List<AWS::EC2::SecurityGroup::Id>'
    Description: A security group to use - needs to have 8888 ingress

ECSTaskDefinitionName:
    Type: String
    Description: A name for your ECS Task Definition
    Default: tinyproxy-taskdefinition

DesiredCount:
    Type: String
    Description: How many containers do you need? 1 container = 1 IP
    Default: 1


Resources:
ECSCluster:
    Type: 'AWS::ECS::Cluster'
    Properties:
    ClusterName: !Ref ECSClusterName
    CapacityProviders:
        - FARGATE
        - FARGATE_SPOT
    ClusterSettings:
        - Name: containerInsights
        Value: disabled
    Configuration:
        ExecuteCommandConfiguration:
        Logging: DEFAULT
    ServiceConnectDefaults:
        Namespace: !Ref ECSClusterName


ECSTaskDefinition:
    Type: 'AWS::ECS::TaskDefinition'
    Properties:
    ContainerDefinitions:
    - Name: tinyproxy-container
        Essential: true
        Image: docker.io/vimagick/tinyproxy
        PortMappings:
        - ContainerPort: 8888
            HostPort: 8888
    Cpu: 512
    Memory: 1024
    RuntimePlatform:
        CpuArchitecture: X86_64
        OperatingSystemFamily: LINUX
    RequiresCompatibilities:
        - FARGATE
    NetworkMode: awsvpc

ECSService:
    Type: 'AWS::ECS::Service'
    Properties:
    Cluster: !Ref ECSCluster
    TaskDefinition: !Ref ECSTaskDefinition
    LaunchType: FARGATE
    ServiceName: !Ref ECSServiceName
    SchedulingStrategy: REPLICA
    DesiredCount: !Ref DesiredCount
    NetworkConfiguration:
        AwsvpcConfiguration:
        AssignPublicIp: ENABLED
        SecurityGroups: !Ref SecurityGroupIds
        Subnets: !Ref SubnetIds
    PlatformVersion: LATEST
-
Some points to note:
- obviously only use for authorized purposes
- we are using an image from a public repository (https://hub.docker.com/r/vimagick/tinyproxy) - verify contents if you need to
- Requires public VPC to access the internet
- Security Group needs to allow 8888 Ingress
- “DesiredCount” parameter allows you to spin up multiple containers
- This is not within the free tier - our allocation should cost about $0.03/hour
Deploying stack
- Navigate to AWS Console > CFN > Create Stack (With new resources)
- Upload template file
- Fill up parameters
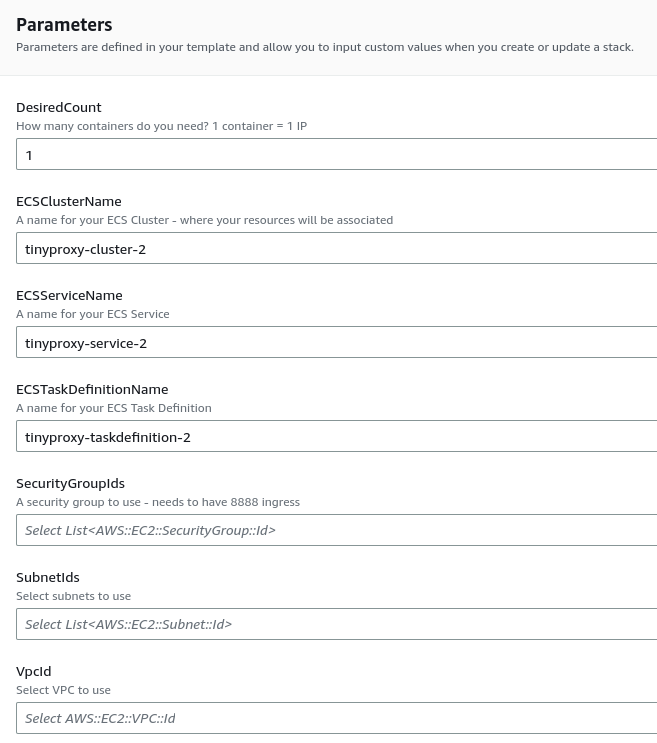
- after deployment is complete, Service & Task should be up and running - our container is ready to go

- click on the task to access container details (e.g. IP address)
